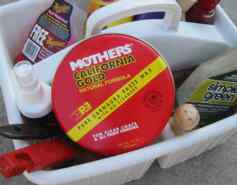
 Once you are comfortable with the condition of the paint, it is time to think of a coating of wax. Wax functions as a paint preserver by helping it to retain certain oils which reduce oxidation. It also serves to protect from environmental hazards such as bird droppings, tree sap, smog and the sun's ultraviolet rays. And it gives paint the depth, gloss and richness that can make all those detailing hours worthwhile. Once you are comfortable with the condition of the paint, it is time to think of a coating of wax. Wax functions as a paint preserver by helping it to retain certain oils which reduce oxidation. It also serves to protect from environmental hazards such as bird droppings, tree sap, smog and the sun's ultraviolet rays. And it gives paint the depth, gloss and richness that can make all those detailing hours worthwhile.
Wax is available in three forms: liquid, paste and spray. As a general rule, liquid wax goes on easier, but does not last as long as the paste products. Which one you use is your choice. Our only recommendation is that you choose one with a high Carnauba content. Unfortunately, there really isn't any way to determine Carnauba content other than to say that if it is prominent on the label, it's a safe bet. Avoid spray waxes as they are too thin to be of any real use.
We recommend a single application of wax. Don't try to put on a thick application with the intent that you won't have to wax as often because it won't work. You'll mostly end up with an excessive amount of wax residue to remove, making the job more difficult. You are better off waxing more frequently. You can use the round applicators that come with some waxes or are available separately. A damp rectangular kitchen sponge makes a good applicator, as its shape seems to be able to handle the detail areas of a car. A second application on the nose and hood, where the wind quickly wears off the wax will give you a longer lasting wax job.
What Goes On, Must Come Off
When the wax is dry, remove the residue using only a very soft cloth. Microfiber towels are ideal. As soon as the cloth movement feel has resistance, find a fresh surface. Using an orbital buffer will speed the job up nicely. A straight (non orbital) buffer would be even faster, but if you are not careful you risk "burning" the paint. For that reason, we recommend our fellow non-professionals stick with an orbital buffer. Always keep an eye on the surface of the cloth you are using, since any dirt or foreign objects can cause scratches.
If you find yourself struggling to remove the wax residue, then you have probably applied to much wax to begin with, which is a common mistake of novice detailers. If you have applied the correct amount of wax, the residue removal will be minimal.
The hard part is removing the wax residue from the various creases and edges. The edges of the doors, trunk, hood and so on are easy; just open them and go over the area with a soft cloth. Fixed items, such as side marker lights, badges, radio antennas, windshield washer nozzles, etc. are more difficult.

Some detailers use a soft bristled toothbrush. This approach works, although we urge caution as scratches can occur if you are not careful. A toothpick can be effective sometimes. It might even be worthwhile to remove some items (badges, side marker lamps, license plates for example) before applying the wax. One Corvette owner we know modified the badges on his car to make them removable with wingnuts whenever a wax job came up.

How Often?
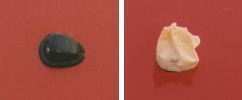
We recommend that you wax your car once every two to three months - more if the car is exposed to harsh conditions. When it comes to deciding if it's time for a new coat of wax, the time-honored water beading test can't be topped. While you are doing the wash pre-rinse, notice how the water drops bead up. If the drops are more than one-half inch diameter, or if the water tends to form "sheets" as in the photo on the left, then a new wax job is a good idea.
Neat Trick Department
 Probably the most troublesome part as far as cleaning wax residue is the windshield
washer nozzles. Try protecting them with masking tape before you apply the wax. The same procedure works on other trim bits as well.

|


